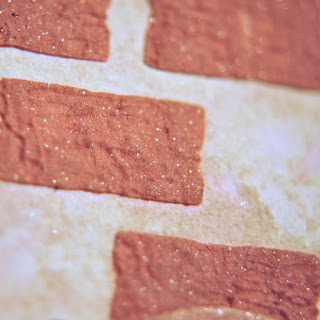
bling on the paste...
Hello my wonderful friends!
I don't know about you, but summer seems to be full of crazy, and wonderful distractions that seem to pull me away from my studio.... Gotta love family, friends, BBQs, hikes and fresh picked berries!
For anyone who has been around here long, you may have noticed that I LOVE texture and dimension in my projects. I was actually working on a LO yesterday, and felt something was missing. When I looked at it again today, I realized it was flat... no texture. No wonder I didn't feel like it was complete. LOL!
A wonderful medium for adding texture and dimension without becoming bulky is modeling paste (also known as texture paste). This is a fabulous paste you can find in the fine art supply section of stores. It is white, which makes it ideal for painting over or tinting before you apply. Now, what is even better than adding texture, dimension, and color all in one to your project? How about throwing in some bling at the same time!
What you need:
Modeling paste
Small jar with lid
Stirring stick (toothpick works!)
Stencil *optional*
Palette knife *optional*
Step 1: put the desired amount of modeling paste into a jar with a lid.
Step 2: mix in the desired color(s) of Creative Inspirations paint. The more paint you add, the more intense the color will be.
Step 3: if you want to use a stencil, place it where you want it on you project. I made this stencil using my Cricut and a plastic sheet (the clam shell packaging is great for this!)
Step 4: apply the colored modeling paste to your project. I like using a palette knife for this, but if you want more texture, try using a paint brush, paper towel, or your fingers!
Step 5: allow to dry. If you let it dry naturally, it will stay how it is... for more texture, dry it with a heat gun. The heat will make the paste bubble... great fun!
The thing that amazes me about this is that even though the paste is opaque, you can still see the shimmer from the paint we mixed in. Isn't that awesome!!!
I love using the bricks as backgrounds. I love how it has this fabulous texture that makes it look so realistic!
For the leaves, I heat embossed them using "Metallic Copper" Deliquesce powder (from CI), then colored the leaves in with Distress markers.... I decided to add some shimmer to the leaves, so I added a little CI paint over the top.
The ribbon is a sheer white ribbon that I painted with a mixture of "Winter Frost" CI paint and some Distress reinker. Custom colors are so much fun!
Enjoy!
~Kassi
Supplies Used:
Paper: Watercolor paper
Ink: VersaMark, Distress
Stamps: Inspired by Stamping "Fancy Labels 18", Fiskars "Aged to Perfection"
Dies: Spellbinders "Labels 18"
Creative Inspirations: Paint (Burnt Sienna, Antique Copper, Winter Frost), Deliquesce powder (Metallic Copper, Clear)
Other: Modeling paste, ribbon, Inspired by Stamping flower


Comments
Post a Comment