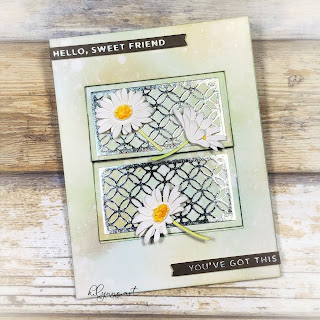
you've got this shutter card...
Hello my fabulous friends!
For all of you celebrating, I hope you are having the best holiday season! For those who aren't celebrating, I hope you are having a wonderful December!
Today I'm back with some new Spellbinders dies from the December release!
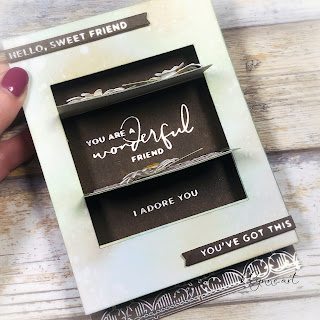
Today I'm looking at the new Daisy Delight Garden Shutters set, and for those of you who enjoy interactive cards, I think you'll like this one!
Let's take a closer look!
Please note, while Spellbinders did send me product and ask me to create with it, my opinions remain my own.
*Affiliate links have been used, this doesn't change the price you pay, but it does really help me continue bringing you exciting new content, so thank you!
Paper: Canson Watercolor paper, Neenah Classic Crest Solar White, Heartfelt Creations
Dies: Spellbinders Daisy Delight Garden Shutters
Foil: Spellbinders Silver
Check out this fun shutter motion!
This card came together really easily... I just followed the included directions.
When I start a new-to-me interactive card, I do a trial run with white cardstock.. That way I can work out all the kinks before using my beautiful patterned papers. This time, my trial card came out so perfectly, I just added some ink to color the cardstock, and used it as my actual project.
I love when interactive card instructions are clear enough that my trial card is good enough to send!
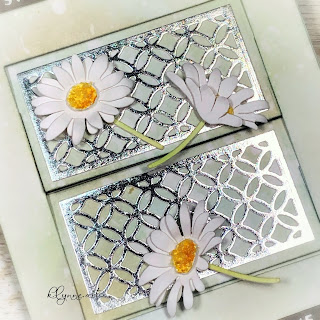
Here's a close up of the closed panels... I die cut the decorative panels from white cardstock, then foiled them... because I love the metalic look!
If you don't want to do an interactive card, these decorative panels and daisies can be used on any project!

Here's a look at one of the daisies... I cut the layers out of watercolor paper because I was going to add color with my paints... but I decided to leave it white... The center of the flower I colored yellow, then glued on some styrofoam shavings died yellow, then attached to the flower with a foam dot for some added dimension.
What are styrofoam shavings? I just rub 2 styrofoam balls together and they grate themselves into these textured little shavings... I dye them with alcohol ink, and use them for texture in flowers and other such places. (or use leave them white for snow!)
I know you can buy actual products to use as your flower centers.. I just like customizing.
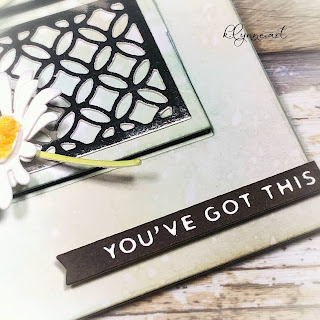
I also added a foiled sentiment on the outside of the card on little banners...
I love how simple this turned out to be! I also like that it can be used as a card as is, or you can do what I did, and glue the whole thing to the front of a normal A2 card so you can still write a personal message inside! It also isn't too thick so it should fit in an envelope without any trouble... as long as you keep your decorations slim.
Comments
Post a Comment