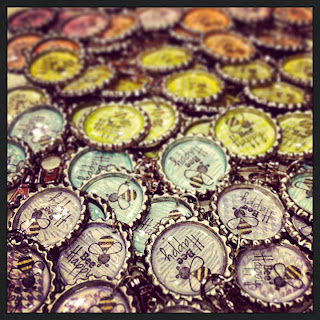
bottle caps...
Hello my wonderful friends!
It has been quite a while! I am so sorry! I have missed you all terribly!
I promised to do a tutorial & product list on my bottle cap zipper pulls weeks ago...
Between the holidays and a couple highly stressful situations, I feel like my entire world has been spinning upside down! How fabulous it is to be doing something as normal and sane as crafting and blogging and sharing a tutorial!
Thank you for your patience with me! You guys are the best!
So, remember these babies?
Here's the how-to
(I bought stuff in bulk since I was making a TON for gifts... however, I got most of it from Amazon. I'll let you know as we go, then you can search around where you like to shop.)
Step 1: Stamp your image on your card stock.
(on the original one, I layered several images from Unity's "Bee Happy Hexagons". For this one I'm using part of a stamp from Unity's "Lasting Thoughts" on a scrap of a gelli print.)
Step 2: Using a die (mine is from Quickutz) or a circle punch, or hand cut if nothing else.... cut out a 1" circle.
Here comes the bottle caps... I got mine at Amazon. You can get them either flattened or not... If they aren't already flattened, you will have to flatten them yourself. I didn't want to spend the time, so I got the FLATTENED BOTTLE CAPS.
Step 3: Use Ranger's Glossy Accents to adhere your circle to the inside of your bottle cap, and let dry.
This tool is not necessary, but makes life a lot easier! EuroPunch Pliers 1.8 mm. This is for punching nice clean holes in the bottle cap. I think I paid around $12 for mine at Amazon. Totally worth it in my opinion.
Step 4: Punch a hole in the top of you bottle cap as near the rim as you can.
These are 1" Circle Epoxy Stickers. Yes, I got them at Amazon. :)
Step 5: Peel off an epoxy sticker from the backing and place it in your bottle cap. Re-punch hole if needed.
Step 5: *second option* If you don't want to use the epoxy stickers, you can fill your bottle cap with Glossy Accents and allow to sit over night. Or use any other kind of resin and follow the directions on how to make it set... If you use this option, punch the hole AFTER the Glossy Accents/ resin has set.
Next you will need either a jump ring (you can get that anywhere that sells things to make jewelry), or a large link from an old piece of jewelry...
Step 6: Use needle nose pliers to open the ring.
Step 7: Slip the ring, the clasp, and any other findings you want to jangle around, then close the ring using your pliers.
I used what are called Swivel Lobster Claw clasps. Again, I got them at Amazon, but I was shopping bulk. Places that sell jewelry and keychain making supplies probably have them.
*For the blue one I used one of the butterflies on Unity's "Dream Big" set as well as a little flower charm.
So, super simple!!!
Enjoy!
~Kassi


Thanks for the tutorial. Happy New Year.
ReplyDeletethese are so amazing, thanks for the easy tutorial! happy new year!
ReplyDelete-Rachel w k
rwkrafts.com
TFS !! These are so cute :) Happy new year.
ReplyDeletelove this idea! I could have used these when I worked on an elementary school playground. Kids always need zipper pulls for their jackets!
ReplyDeleteSo super cute! Thanks for the tutorial!
ReplyDeleteYea! Now I know how you made these. Wonderful! Thanks so much for the tutorial!
ReplyDeleteVery cool project and tutorial. Happy New Year!!!!
ReplyDeleteHappy New Year, Kassi. What a great project. Thank you for sharing it with us. I really like the little bee sentiment. Too precious.
ReplyDeleteThanks for the tutorial Kassi. You nake it seem super-simple to make these cute zipper pulls.
ReplyDeleteThat was a great tutorial! I might even try this, and I am lame at 3D projects.
ReplyDeleteWow, these are fantastic! How were they received? As the nieces and nephews are getting older, these look like great gifts to give! Thanks much for the tutorial.
ReplyDeleteGreat tutorial! Neat project!
ReplyDeleteGreat project, Kassi. Thanks for the tutorial!
ReplyDeleteThese are so adorable & amazing! Thank you so much for posting a tutorial! :)
ReplyDeleteThese are great! Thanks for sharing the "how to", Kassi! Wonderful, beautiful gifts!
ReplyDeleteOh I am loving this idea! Thank you for the tutorial!
ReplyDelete