a little spook, and a little gold...
Hello my wonderful friends!

(and sale!)


I also have been doing some playing with this month's LOL…

I was having fun with a couple different techniques here…
I started by stamping the woodgrain from "Let Love Grow" in white acrylic paint. I then sponged on a few different brown Distress Inks. The paint will resist the color.. FABULOUS! Another great thing Distress inks do, is react to water.. so I put down a stencil and spritzed some water over it… And the watermark rings are born! (I love how simple and understated it is, yet in the overall design, it adds that little extra something.)
Now, to make a heart that shines… literally.

Step 1: Rub background with an anti-static powder. This will insure no powder sticks where it doesn't belong.

Step 2: Ink up the stamp with Distress Ink. (If you want to use a different brand of dye ink, you need to FIRST ink with VersaMark, then the ink over top. It won't hurt your ink pad, but it will allow the image to stay wet long enough to work with.

Step 3: Brush some Perfect Pearl (Ranger) over the image. Then use your brush to tap the powder onto the image (this makes sure the little particles are nice and stuck on the ink.
Step 4: (sorry, no photo of this…) Use your brush to whisk off all the extra powder. Than set the Perfect Pearls with a tiny bit of water…to do this, Mist the water into the air than wave your paper through the mist (like you would with perfume). It doesn't take much moisture to set the resins, and you don't want to get too much water, or your Distress Inks will start bleeding and moving.

Now you have this cool two toned image… from one angle you have dark ink..

I used Black Soot Distress ink, and Perfect Gold Perfect Pearls.. try mixing and matching different colors for awesome effects!
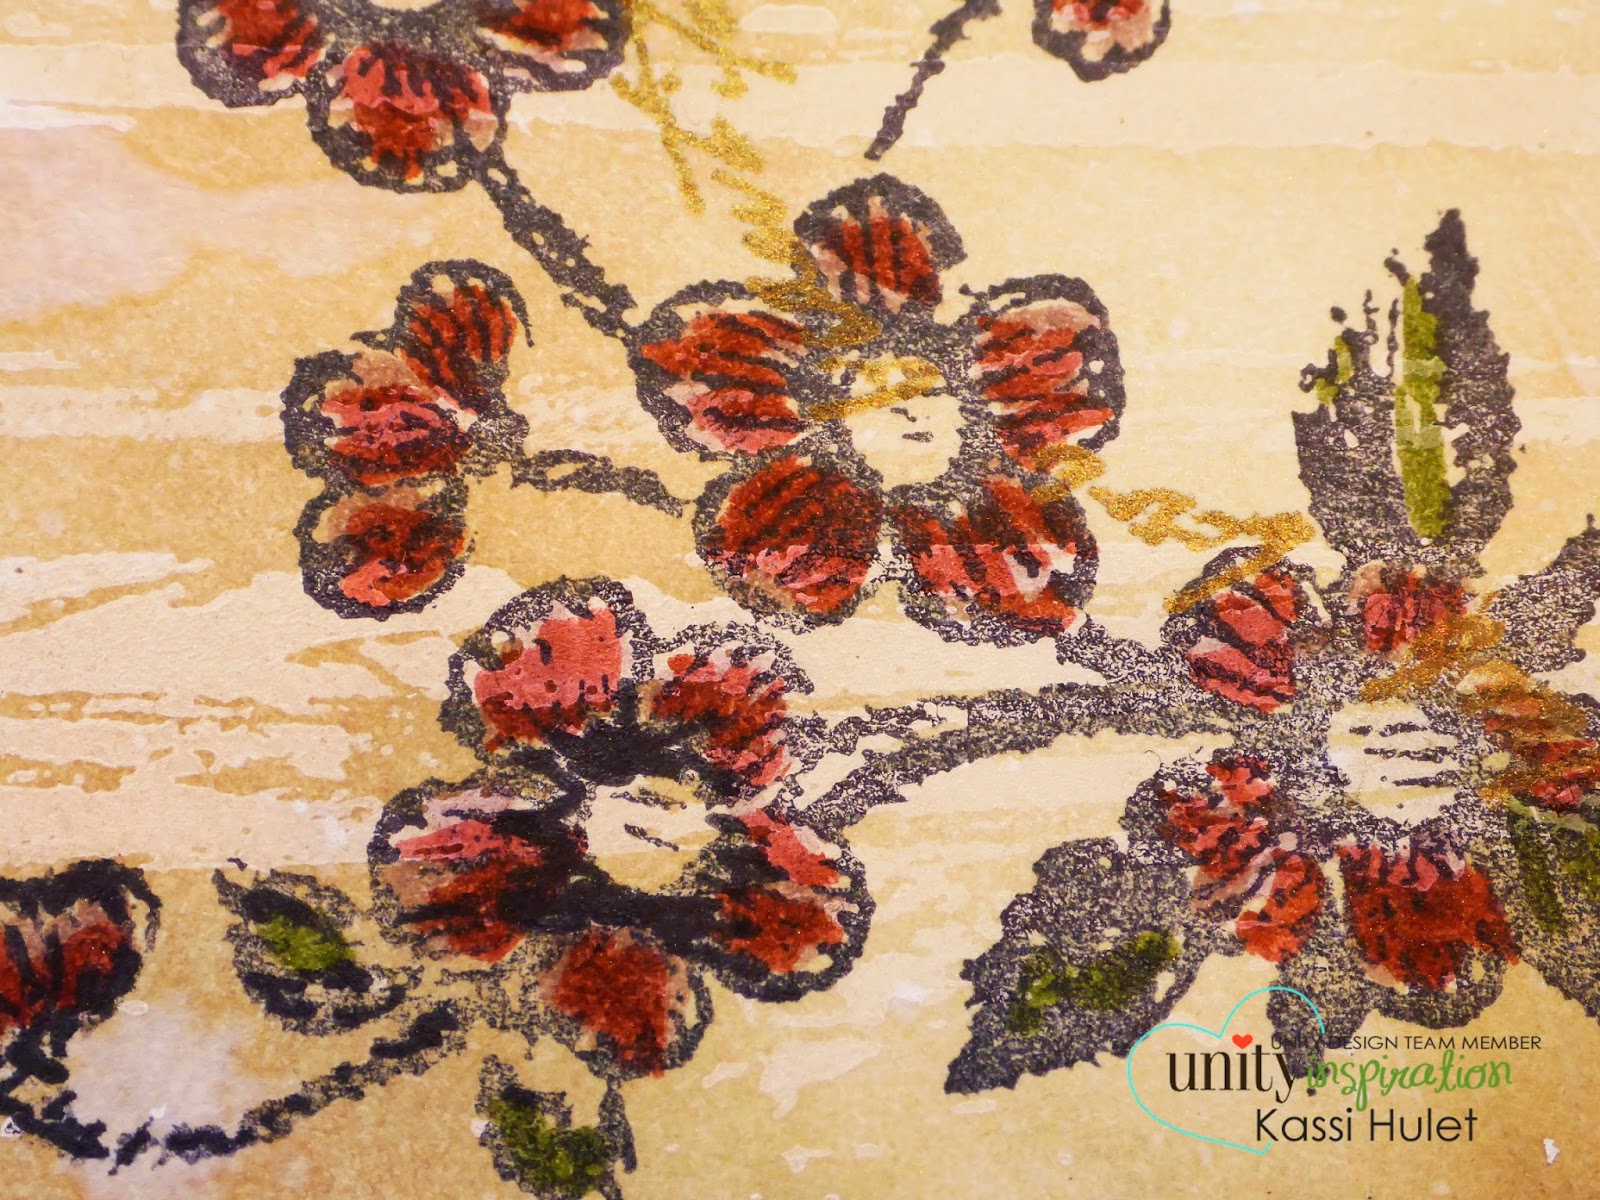
The flowers were stapes with archival ink, with a little Distress Marker coloring over top… I love how those gold letters look!
Don't forget---
Leave a comment on EACH blog in the hop (including the Unity blog) for your chance to win. The winners will be announced Saturday night on the Unity blog.
Enjoy!

wow, the LOL creation looks beautiful!
ReplyDeleteLove your cards! Wonderful!
ReplyDeleteLove your techniques!
ReplyDeleteWonderful projects. Thanks for the technique tutorial.
ReplyDeleteFun, silly and lovely cards
ReplyDeleteEverything looks great, but the heart with flowers is awesome.
ReplyDeleteBeautiful heart design and process. Thanks for sharing another awesome tutorial Kassi.
ReplyDeleteGreat cards! Thanx for sharing your techniques, too. Love them all.
ReplyDeleteBeautiful card! Thanks for the tutorial. I love good tutorials :-)
ReplyDeleteBring on Halloween and fun new stamps to play with! LOVE!
ReplyDeleteCute spider. Adore the pumpkins with that gorgeous background. Thanks for the tips
ReplyDeleteSuch cool cards!!!
ReplyDeleteSuper fun Halloween cards and I love perfect pearls! Thanks for the tutorial on them and setting them!
ReplyDeleteYour Halloween card are GREAT!
ReplyDeleteI had no clue what to do with that heart stamp, but you nailed it!
ReplyDeleteExquisite. Thanks for sharing the how to.
ReplyDeleteLove it all.
ReplyDeleteWonderful projects. Love the pumpkin card. Great background. Thanks for the tutorial for the perfect pearls....I have never had much luck with them. I need to try again. TFS
ReplyDeletegreat cards with the new stamp. Thank for all the info on how you did it.
ReplyDeleteOhhhh! Another new technique to try...& more supplies to buy since I don't have any Perfect Pearls yet either... Love your creations & I agree about Halloween being too distracting! It's my favorite holiday!
ReplyDeleteI was so thrilled that you shared your tutorial! What a great effect and sounds so easy to do.Loving the Halloween designs.
ReplyDeleteThe technique with the Perfect Pearls is amazing! I had no idea! I'll try it as soon as I'm finished hopping!. Setting out the Pearls now so I wont forget!
ReplyDeleteLove all your projects and tutorials :)
ReplyDeleteYour cards are lovely!
ReplyDeleteCute for Halloween and lovely heart card.
ReplyDeleteGreat fun Halloween cards. And I love the lol kit card. That background is gorgeous and I like that perfect pearl sentiment.
ReplyDeleteWow. Oh Wow. How stunning.
ReplyDeleteVery cute
ReplyDeleteSuper cute projects! Thanks for the tips and tricks!
ReplyDeleteFANTASTIC -- I love the Perfect Pearls lettering !! Beautiful.
ReplyDeleteThe Halloween cards are adorable! I really LOVE the LOL card! Thanks for sharing the technique.
ReplyDeleteLove the Halloween cards.
ReplyDeleteisoscia at aol dot com
You know I have Perfect Pearls gathering dust....I love ,love, love tutorials with Unity stamps....thanksgiving that!!
ReplyDeleteThanks for the tutorial on that pretty card. I love the Halloween cards. They are so colorful!
ReplyDeleteKassi, I love all of it!! The second halloween card is just absolutely stunning. my Fav!!
ReplyDelete