Hello my fabulous friends!
Note: Products were provided by the company, however my opinions remain my own. Affiliate links have been used. This doesn't affect the price you pay, but it does a lot to help me continue bringing you new content. Thank you so much for your support!
Today I'm looking at the new a few of the new Stitched Alphabet dies from Spellbinders. You can get the whole collection of letters if you want to invest in the whole alphabet, but if you only want certain letters, you can also get them individually.
I'll be honest, I haven't done stitching on my cards in a long time... and these new alphabet dies were the perfect time to not only revisit a technique I've neglected, but also to see what else these letters can do.
Let's take a closer look!
Please note, while Spellbinders did send me product and ask me to create with it, my opinions remain my own.
This first one features the
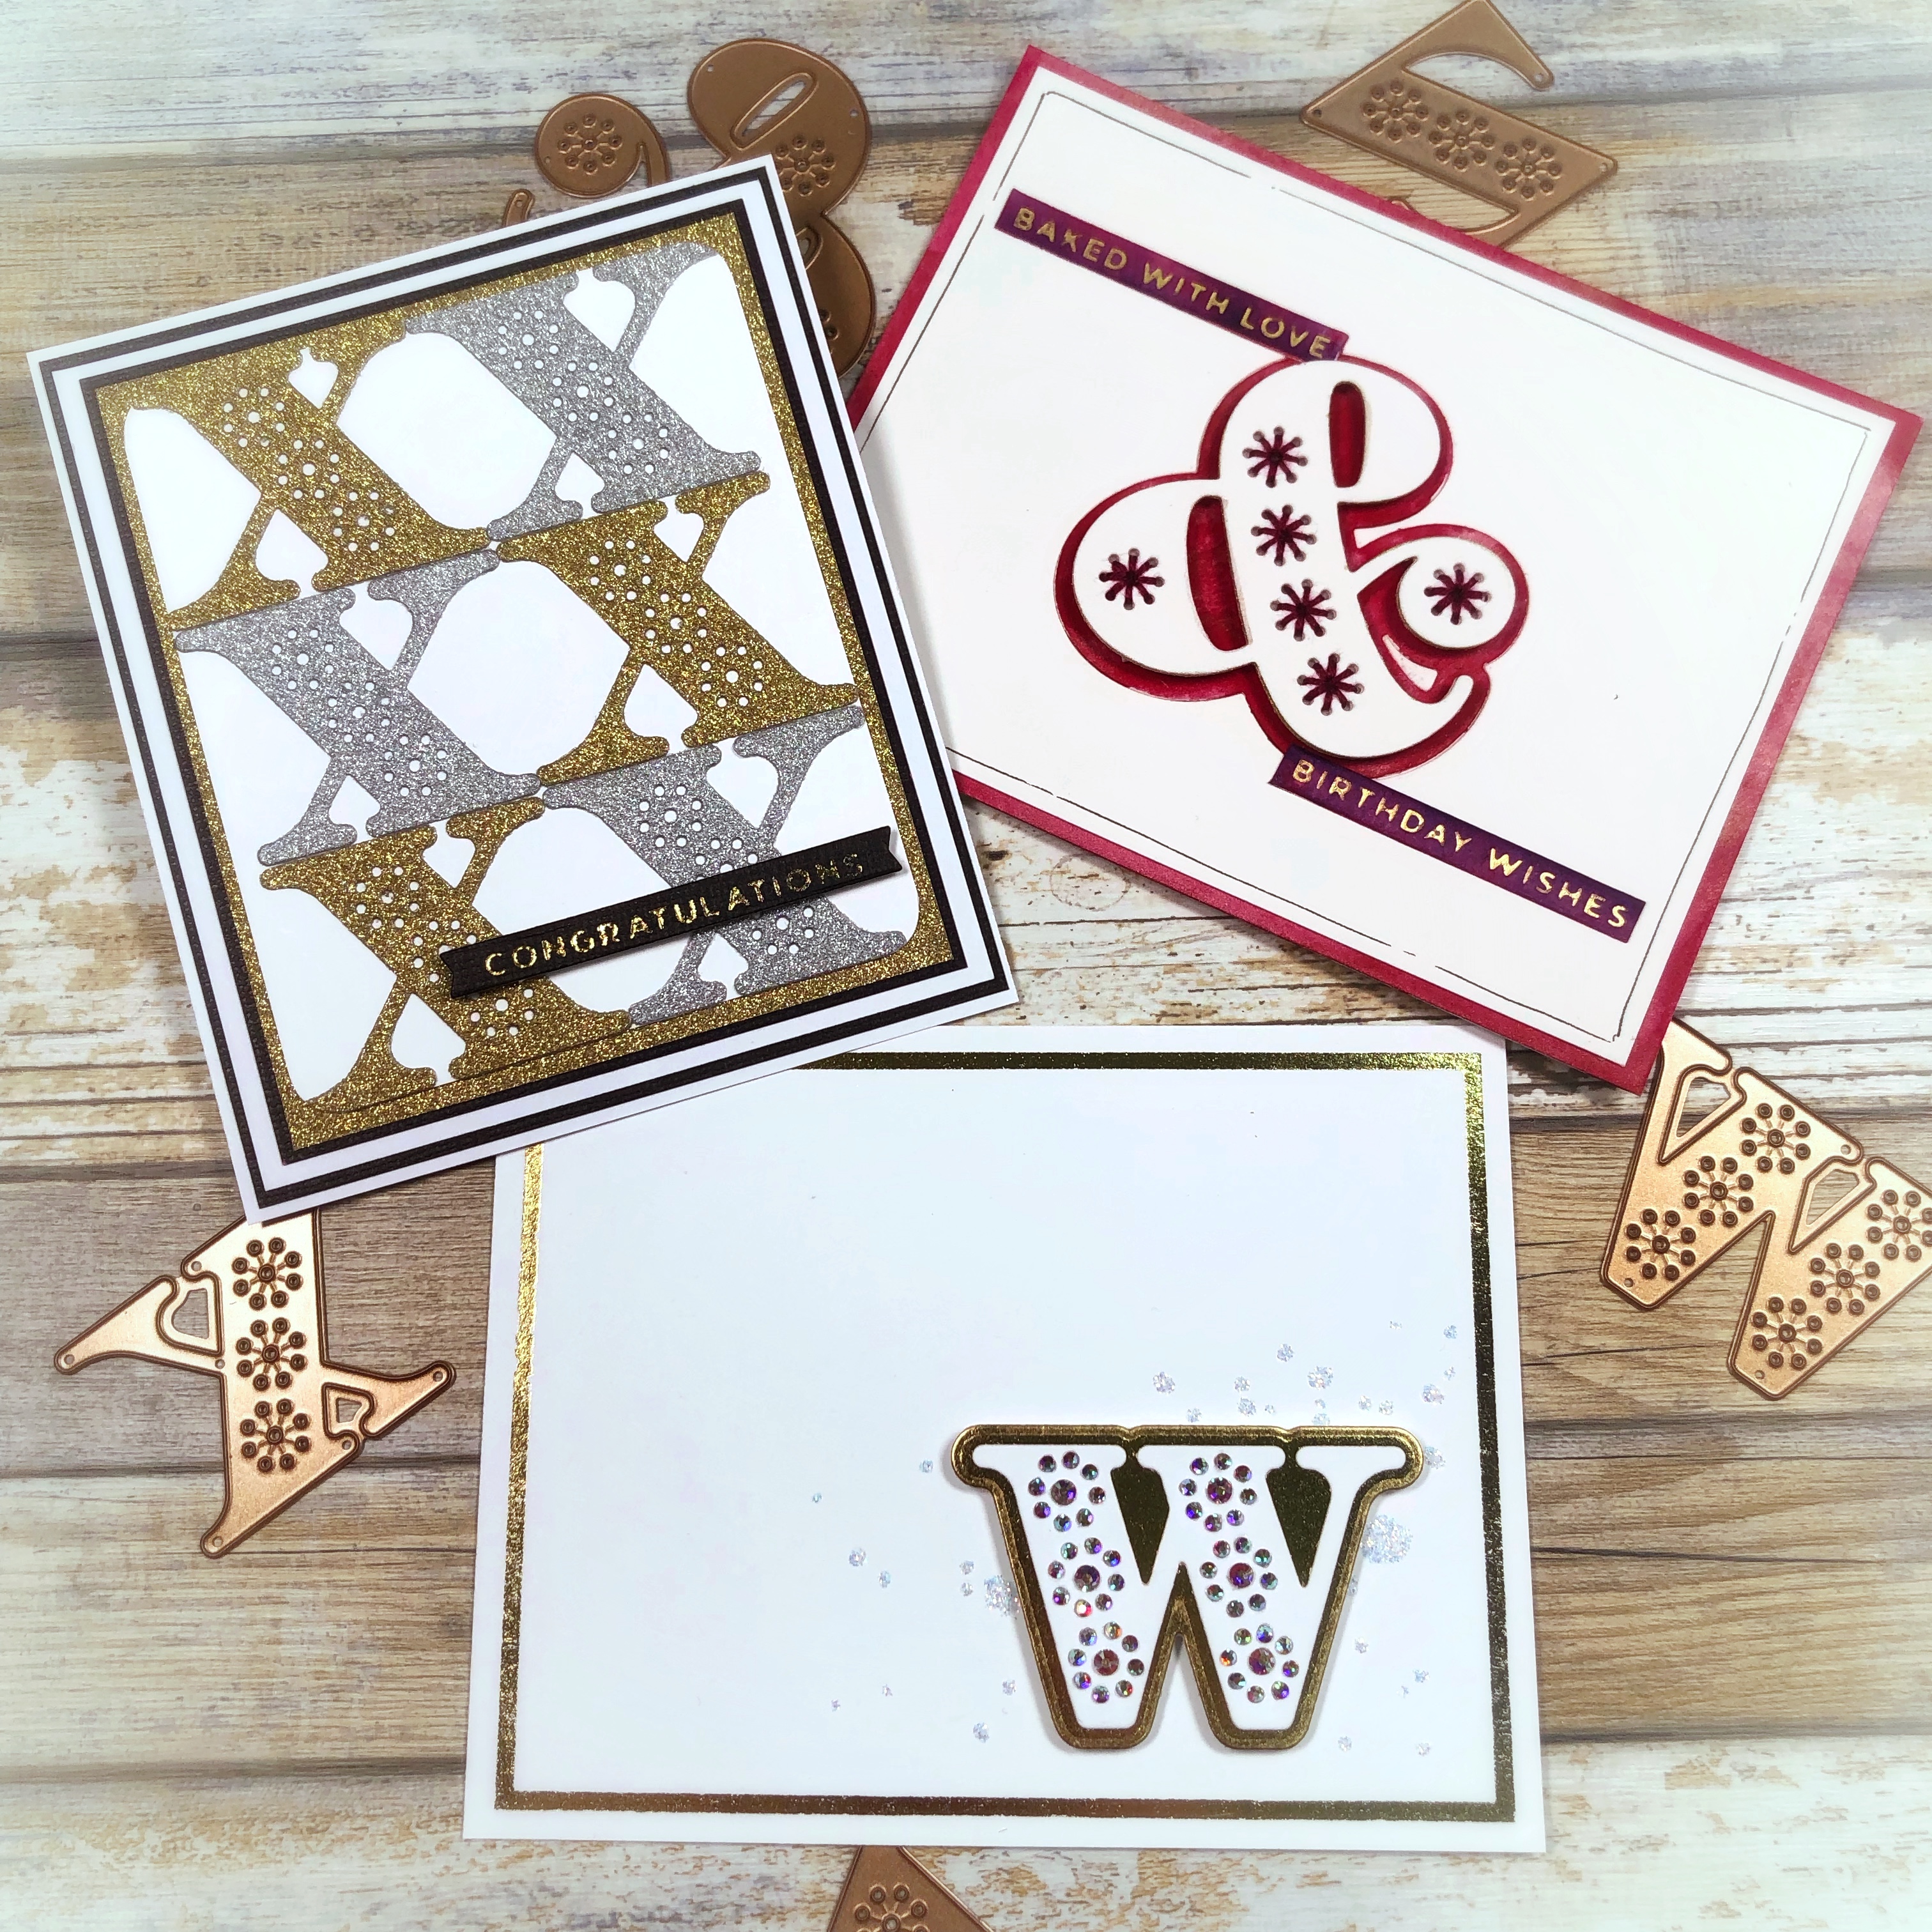
Stitched &, using it in the way it was designed... with stitching.
These letters are big enough to make a bold statement on your card, so I kept the rest nice and simple. The holes make creating stitches super easy! I Die cut two layers of cardstock and glued them together to give me a heavier surface. I also painted the edges with gold to make it a bit fancier (hard to see in a photo, but if you look at the card from the side, it gives it a nice touch.)
The shadow layer was cut into the white card base, I then inlaid the pink piece to give a flat surface. I then adhered the stitched piece with foam tape.
Now it's ready to be slipped into a box of yummy cupcakes!
This next card features the Stitched w.
I again let the letter be bold and the main focus... perfect for those projects you want to monogram!
However, instead of stitching, I used the holes as guides to place gems. I know that not everyone loves taking the time to glue on a bunch of tiny gems, but I love it... and the holes make it so much easier to get perfectly even designs!
The shadow layer for this is foiled with
Gold foil for that extra elegance. It's adhered to the card with foam tape to create even more dimension, and behind it is random globs of Stickles for a little extra sparkle without being distracting. The gold frame around the card uses the
Splatter Sentiments foil plate (one of my favorites!).
And finally, I saw the
Stitched x, and wondered what would happen if I didn't use it like a letter at all.. instead, I used it like a shape that could create a repeating pattern... And I kinda love it. It makes a nice masculine background!
I cut the 'x's from gold and silver glitter paper (which the die cut beautifully!), added in a few layers of white, black, and gold paper, added a sentiment, and it's done!
I love that these large letters can create a bold statement without a lot of work. And it was fun push outside the box and see what else these letters could do!
Do you like using letter dies on your projects?


Comments
Post a Comment