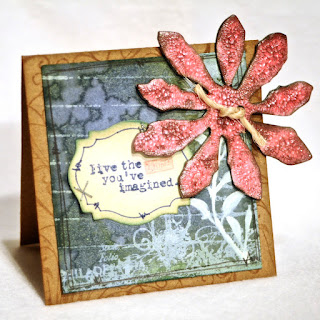
crack your shimmer...
Hello all my wonderful friends!
for those of you who stopped by earlier, sorry the page was weird... blogger is odd sometimes. I think I have it figured out now....
A few months ago, I took a class taught by Tim Holtz. A fabulous class full of great information! One of the products we used for that class was Ranger Crackle paint... who ever figured out how to make one step crackle paint is a genius!
So, how does this relate to Creative Inspirations Paint? Well, I'll let you in on a little secret... Ranger makes a one step crackle paint that is CLEAR...
I am SOOO in love! I admit, one of my first thoughts I had when I picked up my jar of this stuff is... "I wonder if I can tint it with CI paints????" (ummmm... is there a 12 step program for CI addiction? LOL!)
Guess what....
IT WORKS!
I love it when products play well together for fabulously amazing results!
So, let me walk you through this so you can start cracking your shimmer!
What you need:
Ranger Distress Rock Candy Crackle paint
Creative Inspirations Paint
Small jar with lid
Palette knife
Dark ink (Optional)
Step 1: mix some Rock Candy clear crackle paint with your choice of Creative Inspirations paint in your small jar. (I like to reuse my empty CI jars.) Ratios are up to you depending on the intensity of the color you want.
Check out that shimmer! YUMMY!!!
Step 2: Use a palette knife to spread a layer of tinted crackle paint over the area you want crackled. This part kinda reminds me of frosting a cake.... you want a nice layer, not too thin, not too thick.
Step 3: Set it aside to dry. Depending on how thick your layer is, as well as temp and humidity, drying time will vary. Be patient, and don't rush it.
Now you can stop here if you want.... It has a beautiful stained glass look that is packed with shimmer! Love it!!
I like to take it a step farther to enhance the cracks...
Step 4: apply a dark color of ink or CI paint and work it into the cracks.
Step 5: Use a damp rag to wipe off the extra ink/paint. The crackle paint will act as a resist, so the only dark ink/paint you should have left is what has been worked into the cracks.
Check out that fabulous color, shimmer, and texture! I love doing this!
Since we mixed this up in a jar, just screw on the lid to store the extra.. no waste! (gotta love that!) Don't forget to label it so you know what you have. I have tons of mixes stored this way.
Enjoy!
~Kassi


Comments
Post a Comment