stencils, stamps, and paste...
Hello my wonderful friends!
I cannot tell you how excited I am! I got on my computer to write this post, and I noticed I had some notifications on Facebook...
A post on Unity's page let me know that I am a new member of the design team!!!
*oh, be still my heart!!!*
I am SO excited about this!
Ok... back to the stuff you actually want to see... =)
The other day I set my Silhouette to work cutting more stencils.. (I'm kinda really obsessed... I have no idea how many stencils I have, but it's a lot!)
Anyway, I decided to play around with my stencils, stamps, and modeling paste...
I also grabbed my camera so you could come along for the ride. =)

Step 1: spread modeling paste (or texture paste) through a stencil with largish open spaces.

Step 2: leaving the stencil in place, press a texture stamp into the wet paste... I'm using Unity's "Dots for Sure"
*be sure to clean your stamp well! You don't want dried paste on your stamps. A soft bristled toothbrush is great for getting in the nooks and crannies

Step 3: carefully remove the stencil and allow the paste to dry... (you can speed it up with a heat gun, just be careful to keep the heat moving... too much heat and the paste will bubble.)

Step 4: spray with color... I used Distress Ink sprays, but any kind you want will work...

Step 5: allow to dry (or carefully dry with a heat gun).
for a softer look, take a damp cloth and wipe some of the ink off the paste.

Step 6: (optional) you can stamp on the paste using a permanent ink suck as Archival Ink.

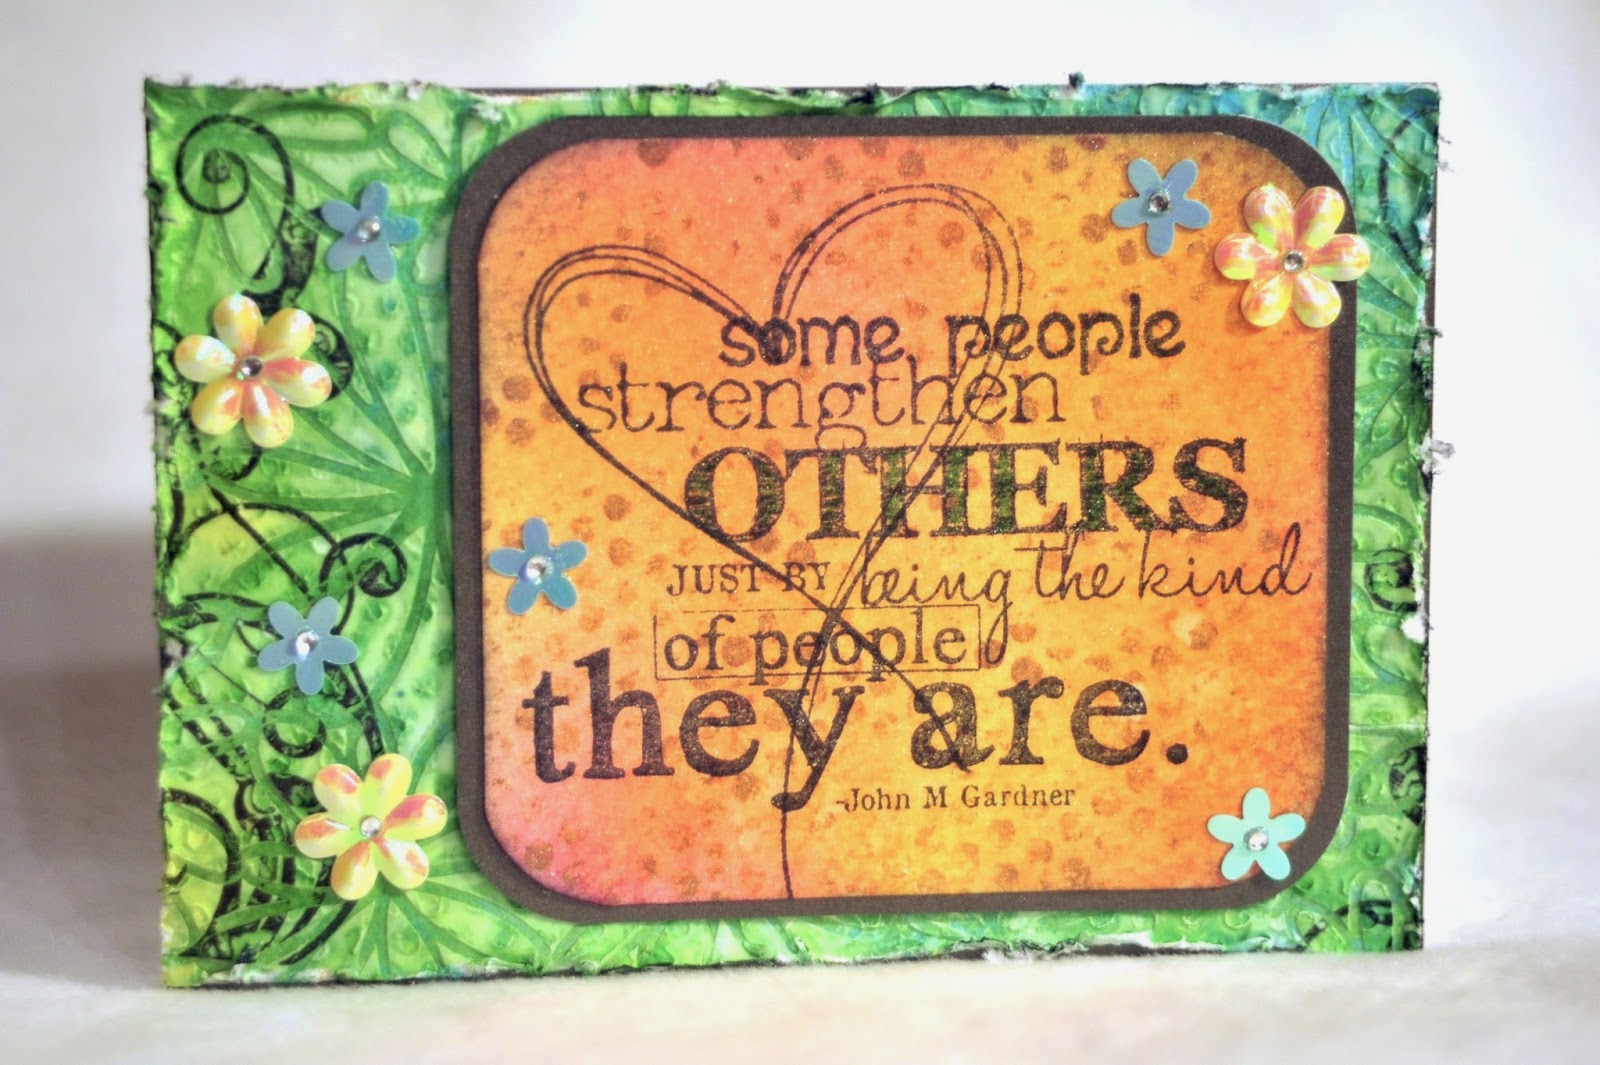
I love the additional pattern you get from stamping over the textured paste. If you look at the picture on step 6, you will notice the swirl is a solid stamp... however, when you stamp it over your texture, it highlights all the textures.

I love the layers of texture! (honestly, it's way better in person because you can FEEL the texture!)

This is made with 3 different stamps.. I love altering the look of stamps by layering them!
Supplies Used:
Paper: DCWV, watercolor paper, card stock
Ink: Distress Ink Archival Ink
Stamps: Unity "Dots for Sure", " Being Kind Strengths Other", "Learn. Discover. Grow" & "Create Today"
Stencil: Silhouette "Doodled Daisies"
Other: Distress Paint, Perfect Pearls, modeling paste, rhinestones, sequin flowers
Congrats Kassi! Your art is amazing, no wonder Unity added you to the DT! Thanks for a great tutorial! Your card is beautiful!
ReplyDeletethis is gorgeous! and congrats. You'll love the team.....it's fabulous and fun and so supportive. can't wait to see what you do.
ReplyDeleteFirstly MASSIVE CONGRATULATIONS for making the design team :)
ReplyDeleteThat is awesome news.
Love the card and the stencil make for such a cool effect.
Kate xx
great BIG congratulations to you, Kassi! i'm looking forward to following you along on your new journey with Unity! your work is amazing…no big surprise you were selected as DT…thanks for sharing the "how to" on so many of your projects! happy friday!
ReplyDeleteCONGRATULATIONS!!! I am so happy for you that you made the Unity design team, I love your art and am excited to see your future Unity creations! This card is so lovely and vibrant. The color combo is stunning!
ReplyDeleteCongratulations and the card and tutorial are wonderful.
ReplyDeleteSuper duper congrats to you Miss Kassi. It's always interesting to see how you put together the beautiful designs you make. So very happy for you. Your project today is gorgeous, as always!! :)
ReplyDeleteCongrats Kassi! Your art is gorgeous. Thanks for the step by step. Hugs~Patti
ReplyDeleteBeautiful! Great techniques.
ReplyDeleteAgain, a wonderful tutorial Kassi. Love this technique and your finished card. CONGRATS!!! on the Unity DT - you rock.
ReplyDeleteAgain, a wonderful tutorial Kassi. Love this technique and your finished card. CONGRATS!!! on the Unity DT - you rock.
ReplyDeleteCongratulations on making the DT. Thank you for this awesome tutorial and your awesome piece of Art. Great job. Enjoy.
ReplyDeleteGreat card Kassi!
ReplyDeleteoh so beautiful! love the colors and the overall work of art :-) Congrats on the DT!!
ReplyDeleteKassi, this is gorgeous!! I always love your step-by-step tutorials. Congrats on your DT! Looking forward to working with you on the team :)
ReplyDeleteWooohoooo congratulations so happeeee for you!
ReplyDeleteScrumdiddleyumptious project!!
Xxx
I am very happy for you, and I am excited to be able to learn from your fun inspirations.
ReplyDeleteLove the effect of the texture paste on your background. Congrats on making the Unity Design Team!
ReplyDeleteBeautiful card! Love the tutorials! And super warm congratulations to you! Such a wonderful honor - so well-deserved!
ReplyDeleteCONGRATS!!!! Love your card. Thanks for showing us how it is done!
ReplyDeleteGorgeous card! Congratulations on becoming part of the Unity DT - love your work and look forward to seeing all of your new upcoming creations! :)
ReplyDeleteCongratulations to you, Kassi! You are a perfect addition to the Unity family. Thank you for the great tutorial. I will be sure to add some texture to my upcoming projects. Beautiful card.
ReplyDelete