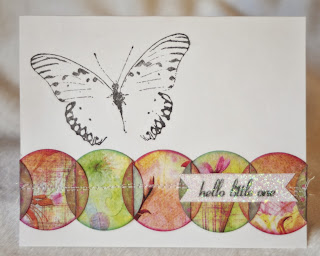
circles in a row...
Hello my wonderful friends!
I was asked how I made the border on this baby card that I shared during the Unity Friends Blog Hop... So, I thought I would put together a quick little tutorial.
First off, punch or die cut a bunch of circles from double sided paper.
Next, cut a square of paper that just BARELY fits inside your circle. The corners should each be touching but not going past the edges of the circle... yeah, mine isn't perfect, your's doesn't have to be either, however, the more precise you are, the better everything will line up in the end.
Score and fold two sides of your circle using your square as your guide.
You will want half of your circles folded from one side and half from the other.. (in my case, half are folded with the blue facing up, and half with the yellow facing up)
Glue down your flaps
Now, line them up going every other one.
Simple. :)
Enjoy!
~Kassi


Thanks for the tutorial, Kassi. Cool stuff....
ReplyDeleteThanks for the tutorial! Pinned it for future reference!
ReplyDeleteAwesome idea. Loved how it looked on the card and glad you showed how you did it. Thanks,
ReplyDeleteKassi... you won the Unity Challenge.. you saw the announcement?
ReplyDeleteWhat a cute little card.
ReplyDeleteBeautiful card, Kassi. Thank you for doing a tutorial on how to make the border. And congratulations on being part of the Unity Stamp Co. blog hop.
ReplyDelete