aged buttons...
When I was growing up, my mom kept a big jar of buttons in her closet. My sisters and I would spend hours playing with those buttons. I loved looking at all the different sizes, shapes, textures and colors. I loved scooping up handfuls and letting them trickle through my fingers making a musical clinking as they landed back in the jar. And I can't count the number of times we served "Button Soup" to the family.
Perhaps because of that, I have always loved buttons. And, as buttons have become such a popular craft embellishment, I have accumulated my own large jar of random buttons. So, for today's Inspiration Monday, I thought I would show you one way that I alter buttons.
Aged Buttons
You will need:
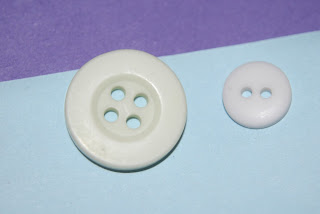
Button *light colors are easier to alter the color*
Creative Inspirations Paint *optional*
Sticky note
Crackle Accents by Ranger
Dye ink *I like Distress ink*
Makeup wedge
Ink blending tool
Step 1: Pull off a sticky note, and flip it over. There is a strip of temporary adhesive on the back. Stick your buttons onto that. This allows you to hold you buttons without your fingers getting in the way.

Step 2: Using a makeup wedge, apply the Creative Inspirations paint to your button in a pouncing motion.
Step 3: The paint will go on fairly thinly, so you will need to build up a few layers. Allow your button to dry, and pounce on your next layer.

Step 4: Continue adding layers until your button is completely covered and the original color of the button no longer shows through.
Step 5: Let your button dry completely. This is important!

*Crackle Accents by Ranger is the real secret to this technique. *

Step 6: Apply a coat of Crackle Accents to your button. How thick you apply it will determine how small or large your cracks are. I like to apply a nice thick coat for larger cracks, but it is up to you.
Step 7: Let dry NATURALLY. Depending on how thick your coat is, this could take a while. Don't be tempted to speed it up with a heat gun as that will ruin it. *This part is the hardest for me. I HATE
waiting! I usually set the buttons aside and work on another project. Because they are on the sticky note, they are easily moved.*

As your button dries, cracks will form. These cracks are random and no two buttons will end up the same. *I love that!*

When your button is completely dry you can add ink. You don't have to do this, but it does add contrast and the cracks show up better.
Step 8: Using an ink blending tool, rub ink into the cracks. This takes a little pressure, so don't be afraid to really work the ink in.

Step 9: Gently wipe the excess ink off of your button with a slightly damp rag.

You will be left with ink only in the cracks like this. When your ink is dry, you are ready to attach it to your project.
Here is the project I did featuring this technique:

Paper: Coredinations, white cardstock
Stamps: Fancy Pants "Doodles and Things", "On a Whimsy", Glitz "Distressing"
Ink: VersaMagic, Distress Ink, Memento
CI paint: Mango
Other: Provo Craft "Polka Dots" embossing folder, ribbon, buttons, Crackle Accents by Ranger

You can see that the shimmer from the CI paints still shows through beautifully.
 Here is a button that I didn't alter the color, I simply put the Crackle Accent over the plain button.
This button was altered with Alcohol ink before Crackle Accent was applied.
So, here's to having fun with your stash of buttons today!
~Kassi
I love these buttons, they have a great antique look!
ReplyDelete